In diesem Beitrag zeigen wir euch wie Ihr locker durch das Installieren von Laravel auf Ubuntu 20 kommt. Laravel ist ein Das Framework für den PHP-Entwickler von heute und morgen. Laravel ist hervorragend ausdokumentiert und die Community ist gigantisch. Wer es noch nicht kennt sollte Laravel definitiv mal unter die Lupe nehmen. Nun aber zur Installation:
1. Installation von PHP
Um Laravel laufen zu lassen benötigen wir natürlich PHP. Dieses ist schnell installiert wir nehmen das Repository von Ondreij und installieren PHP mit folgenden Befehlen:
sudo apt install zip unzip software-properties-common
sudo add-apt-repository ppa:ondrej/php
sudo apt install -y php7.4 php7.4-gd php7.4-mbstring php7.4-xml php-zip
2. Installation von Apache
Selbstverständlich benötigen wir noch einen Webserver. Da Apache doch noch weiter verbreitet ist als Nginx nehmen wir mal Apache, Nginx geht natürlich auch:
sudo apt install apache2 libapache2-mod-php7.43. Installation von MySQL
Laravel benötigt ausserdem eine Datenbank, welche wir mit folgenden Befehlen installieren und konfigurieren:
sudo apt install mysql-server php7.4-mysql
sudo mysql_secure_installation
Die Fragen des Befehls mysql_secure_installation beantworten wir wie folgt:
Securing the MySQL server deployment.

Connecting to MySQL using a blank password.

VALIDATE PASSWORD COMPONENT can be used to test passwords
and improve security. It checks the strength of password
and allows the users to set only those passwords which are
secure enough. Would you like to setup VALIDATE PASSWORD component?

Press y|Y for Yes, any other key for No: y

There are three levels of password validation policy:

LOW    Length >= 8
MEDIUM Length >= 8, numeric, mixed case, and special characters
STRONG Length >= 8, numeric, mixed case, special characters and dictionary  file

Please enter 0 = LOW, 1 = MEDIUM and 2 = STRONG: 2
Please set the password for root here.

New password:

Re-enter new password:

Estimated strength of the password: 100
Do you wish to continue with the password provided?(Press y|Y for Yes, any other key for No) : y
By default, a MySQL installation has an anonymous user,
allowing anyone to log into MySQL without having to have
a user account created for them. This is intended only for
testing, and to make the installation go a bit smoother.
You should remove them before moving into a production
environment.

Remove anonymous users? (Press y|Y for Yes, any other key for No) : y
Success.


Normally, root should only be allowed to connect from
'localhost'. This ensures that someone cannot guess at
the root password from the network.

Disallow root login remotely? (Press y|Y for Yes, any other key for No) : y
Success.

By default, MySQL comes with a database named 'test' that
anyone can access. This is also intended only for testing,
and should be removed before moving into a production
environment.


Remove test database and access to it? (Press y|Y for Yes, any other key for No) : y
 - Dropping test database...
Success.

 - Removing privileges on test database...
Success.

Reloading the privilege tables will ensure that all changes
made so far will take effect immediately.

Reload privilege tables now? (Press y|Y for Yes, any other key for No) : y
Success.

All done!
4. Installation des Composers
Am einfachsten lässt sich Laravel mittels Composer installieren. Diesen müssen wir allerdings ebenfalls installieren:
apt-get install composer5. Download und Installation von Laravel
Wir clonen uns als erstes Laravel des GitHub-Repositorys:
cd /var/www
git clone https://github.com/laravel/laravel.git
Anschliessend wechseln wir ins Laravelverzeichniss und installieren Laravel mit dem bereits installierten Composer:
cd /var/www/laravel
sudo composer install
Anschliessend noch Nutzungsrechte setzen:
chown -R www-data.www-data /var/www/laravel
chmod -R 755 /var/www/laravel
chmod -R 777 /var/www/laravel/storage
6. Environment-Einstellungen
Nun müssen wir noch die sogenannten Enviromentsettings anpassen. Dafür kopieren wir uns als erstes das File .env.example und benennnen es in .env um:
mv .env.example .envAls nächstes ist noch die Generierung eines Application keys notwendig, welchen wir mit dem simplen Befehl
php artisan key:generategenerieren.
Nun können wir die .env-Datei mal öffnen und den Namen der App als auch die URL anpassen. Bei dieser Gelegenheit prüfen wir auch direkt ob der App-Key in das File geschrieben wurde. Das File sollte nun in etwa so aussehen:
APP_NAME=Laraveltest
APP_ENV=local
APP_KEY=base64:HFdS7c9rhDp+AeHu7kc2OLBPuxHqq2BQ/1gfFWEpoAk=
APP_DEBUG=true
APP_URL=http://localhost
...
7. Generieren eines MySQL-Users
Als nächstes benötigt Laravel natürlich einen Zugang auf die Datenbank, wofür wir einen User erstellen:
mysql -u root -p
CREATE DATABASE laravel;
CREATE USER 'laravel'@'localhost' IDENTIFIED BY 'Passwort';
GRANT ALL ON laravel.* to 'laravel'@'localhost';
FLUSH PRIVILEGES;
quit
wieder im .env-File können die Datenbankangaben eingegeben werden:
DB_CONNECTION=mysql
DB_HOST=127.0.0.1
DB_PORT=3306
DB_DATABASE=laravel
DB_USERNAME=laravel
DB_PASSWORD=Passwort
8. Apache konfigurieren
Bald fertig aber noch nicht ganz. Wir müssen dem Apache noch die Angaben des Document Root liefern. Dies ist relativ einfach in dem wir die default. conf öffnen und folgendes Eingeben:
nano /etc/apache2/sites-enabled/000-default.conf<VirtualHost *:80>
ServerAdmin webmaster@localhost
DocumentRoot /var/www/laravel/public
<Directory />
Options FollowSymLinks
AllowOverride None
</Directory>
<Directory /var/www/laravel>
AllowOverride All
</Directory>
ErrorLog ${APACHE_LOG_DIR}/error.log
CustomLog ${APACHE_LOG_DIR}/access.log combined
</VirtualHost>Anschliessend lassen wir den Apache noch die Konfig neu einlesen:
sudo systemctl restart apache2 9. Fertig
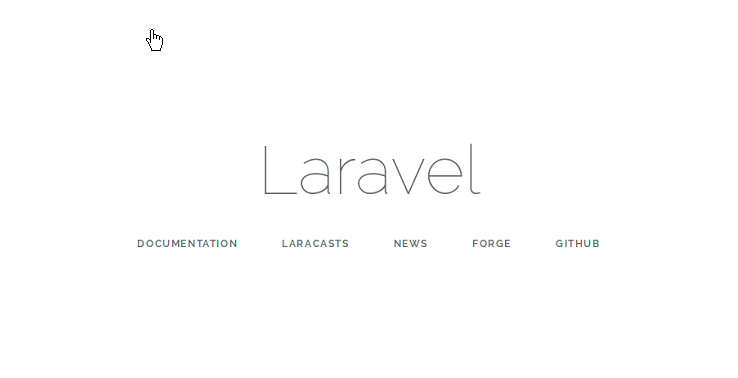
Perfekt – Installieren von Laravel auf Ubuntu 20, Job done. Im Browser localhost eingeben und schon sehen wir die Demoseite von Laravel. Das heisst, es hat wohl alles funktioniert, happy developing.